SitecoreAI CMS Content SDK: Complete Local Setup Guide
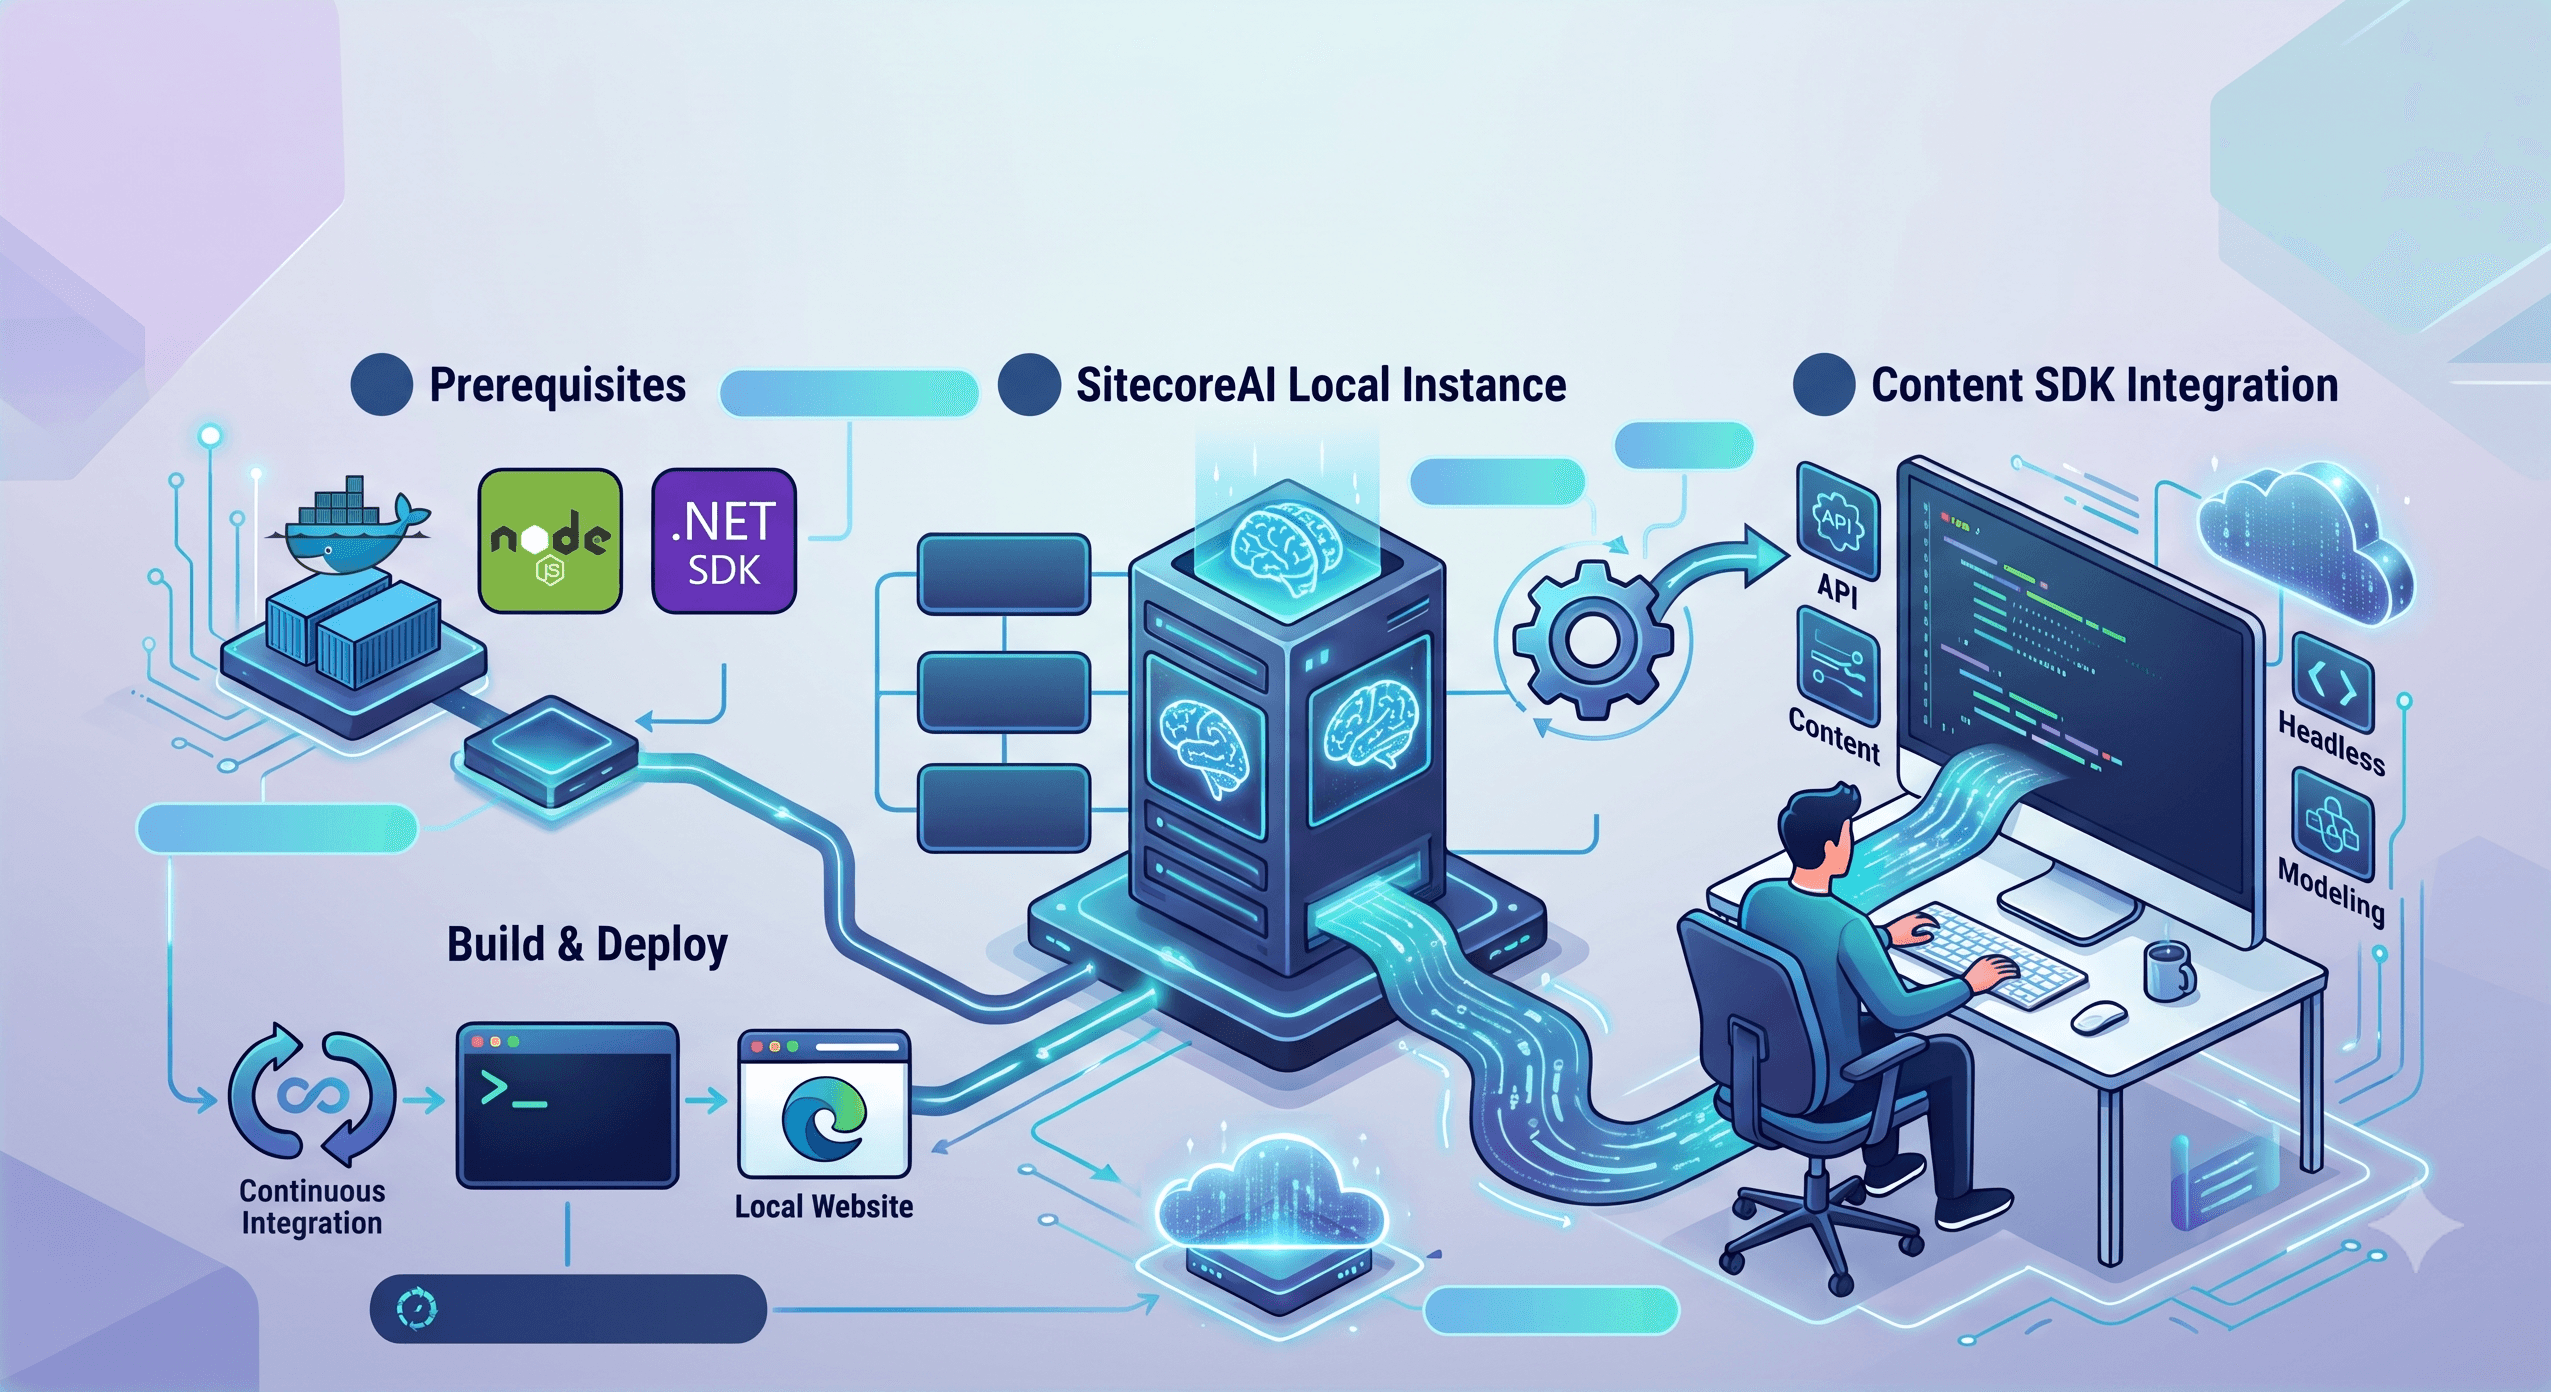
A comprehensive guide to setting up a local SitecoreAI CMS development environment with Docker containers and Next.js front-end applications using the Sitecore Content SDK.
🛠️ Prerequisites
Before you begin, ensure you have the following installed and configured:
- .NET SDK 9.0 - Install from dotnet.microsoft.com. Installing the SDK includes the corresponding runtime. Verify installation by running
dotnet --infoin your terminal. - .NET Framework 4.8 SDK - Required for Sitecore tooling compatibility
- Node.js LTS - Install the latest LTS version from nodejs.org or via npm
- PowerShell 5.1 - Pre-installed on Windows 10/11
- Hyper-V - Enable from Turn Windows features on or off
- Docker Engine - If not installed, follow the setup guide at sitecore-docker-engine-scripts
- Sitecore Cloud Portal Account - Register at portal.sitecorecloud.io. If you already have access to the SitecoreAI CMS portal and are part of an organization, you can skip registration. Otherwise, create an account even if you don't have an organization yet - this is required for local environment authentication.
🚀 Part 1: Setting Up the Local CM Instance
📥 Step 1: Clone the Repository
For this setup, we'll use the official xmcloud-starter-js repository, which includes the Content SDK sample application and the required project structure.
git clone https://github.com/Sitecore/xmcloud-starter-js
📄 Step 2: Place Your Sitecore License
Copy a valid Sitecore license file toC:\License\license.xml.
⚙️ Step 3: Initialize the Environment
Open PowerShell and navigate to the cloned repository:
cd C:\path\to\xmcloud-starter-js
Run the initialization script:
.\init.ps1 -InitEnv -LicenseXmlPath "C:\license\license.xml" -AdminPassword "b"
🔒 Step 4: Configure Node.js Certificate Authority
Set the certificate environment variable:
setx NODE_EXTRA_CA_CERTS C:\Users\<YourUsername>\AppData\Local\mkcert\rootCA.pem
Important: Close and reopen PowerShell after running this command for the changes to take effect.
🐳 Step 5: Start the Containers
Navigate back to the repository folder and run:
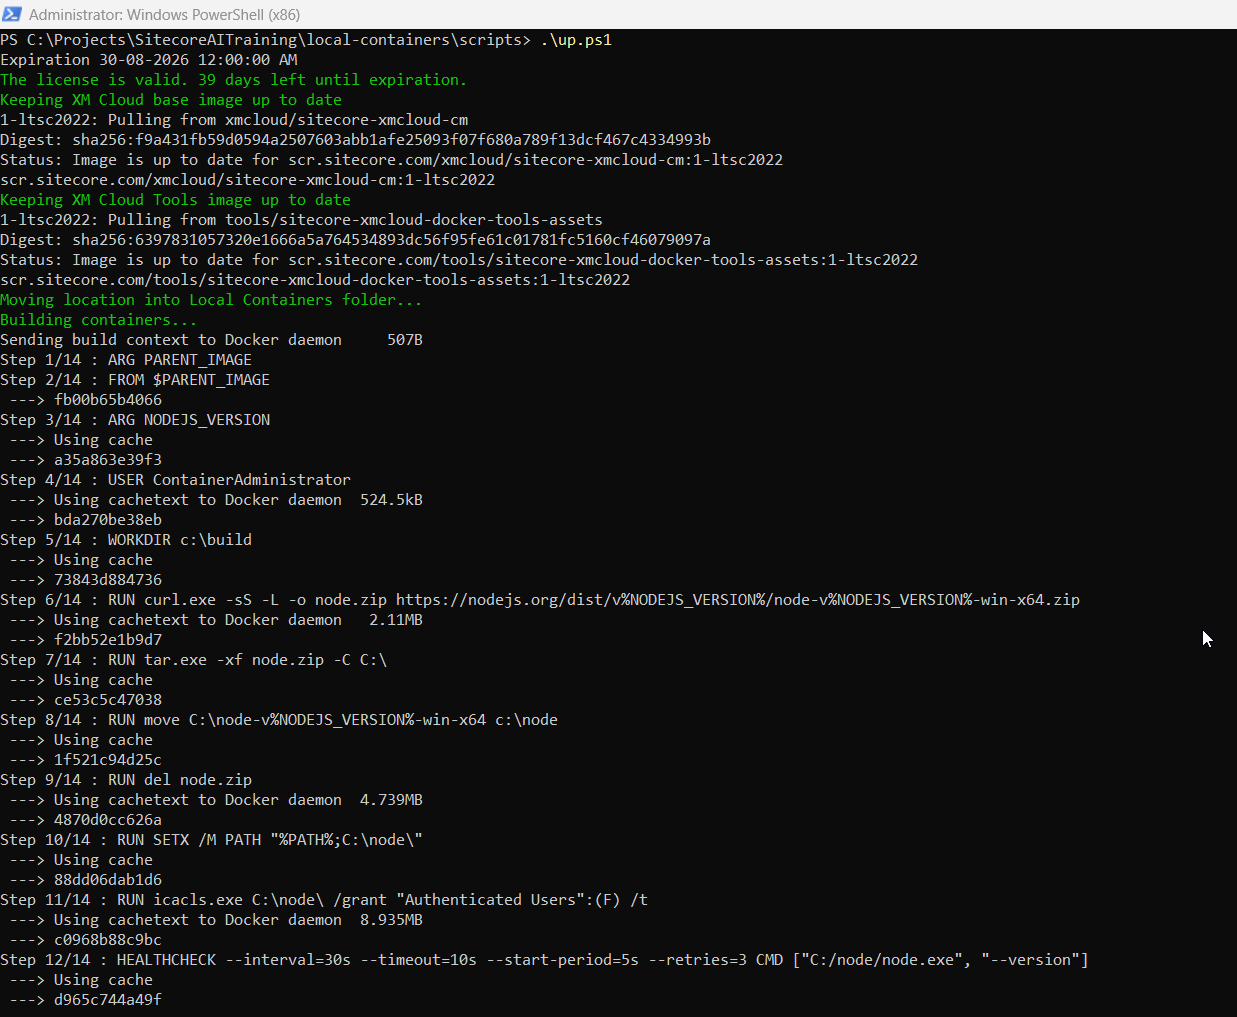
.\up.ps1
This script will:
- Download Sitecore Docker images
- Install and configure containers
- Set up the client application
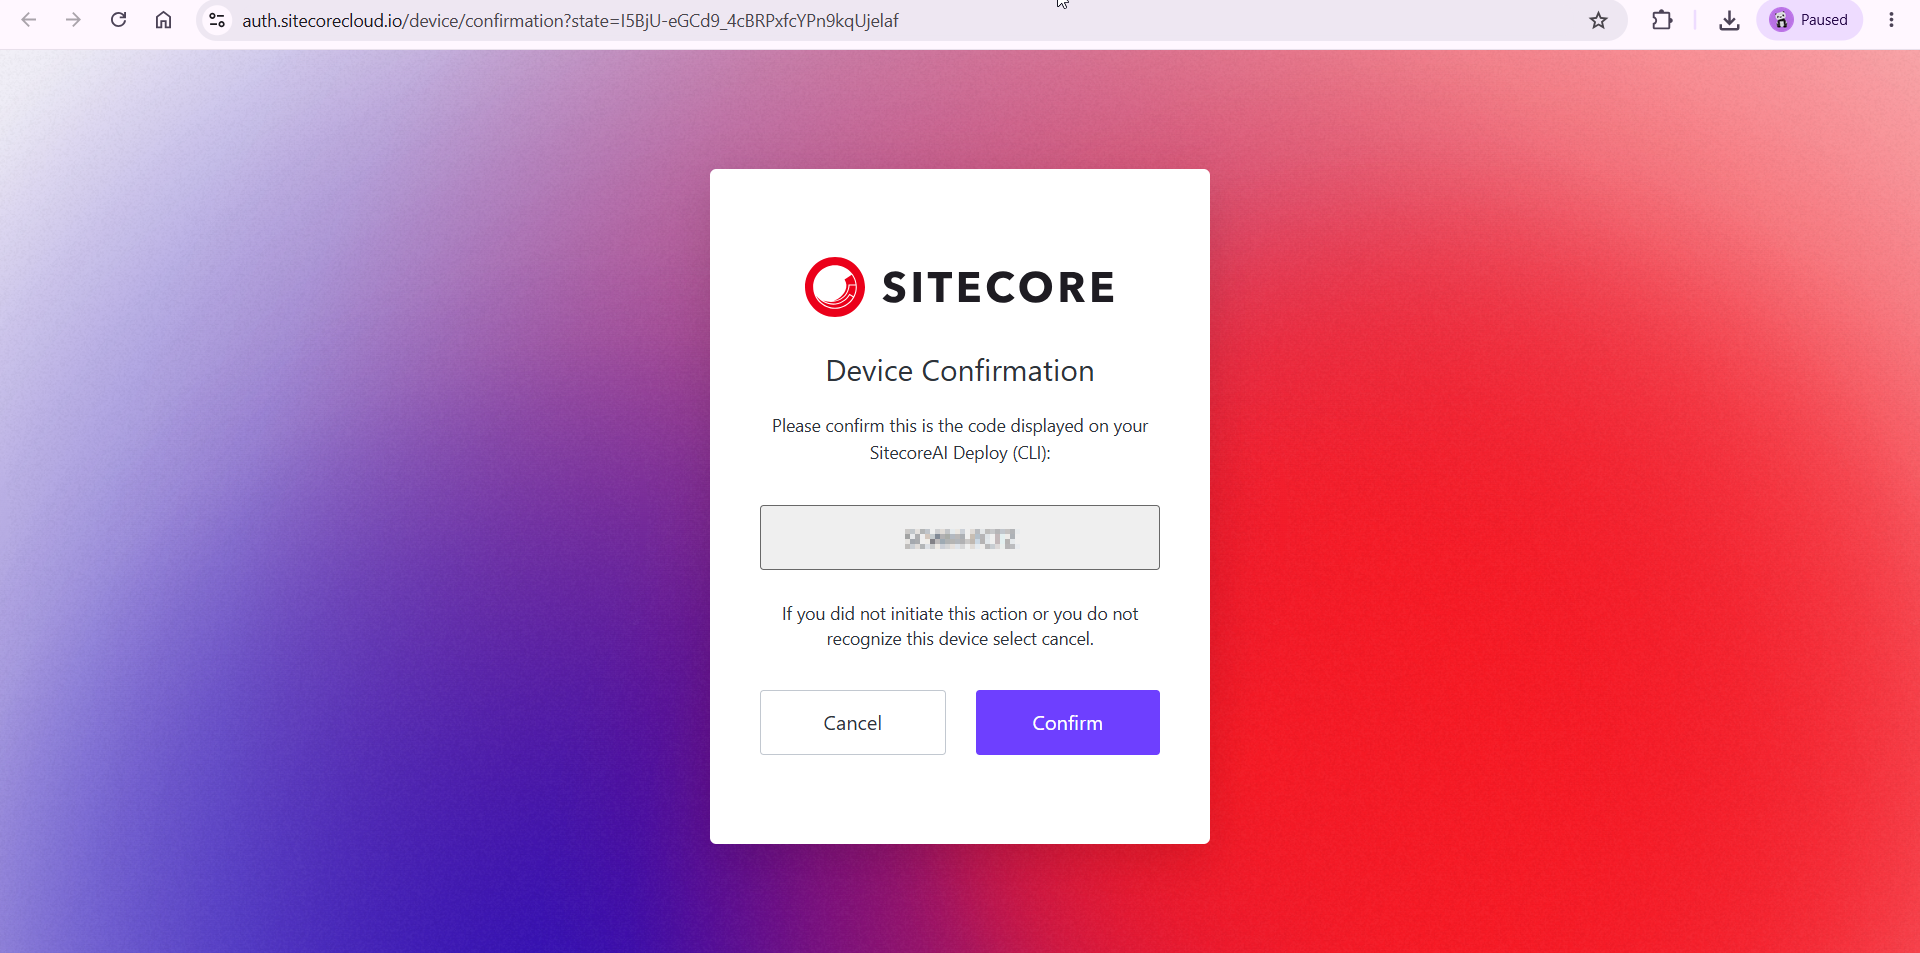
🔑 Step 6: Authenticate with SitecoreAI CMS
- A Device Confirmation screen will appear
- Confirm the device
- Log in to the SitecoreAI CMS portal when prompted
- Wait for the CLI to populate the schema and build indexes
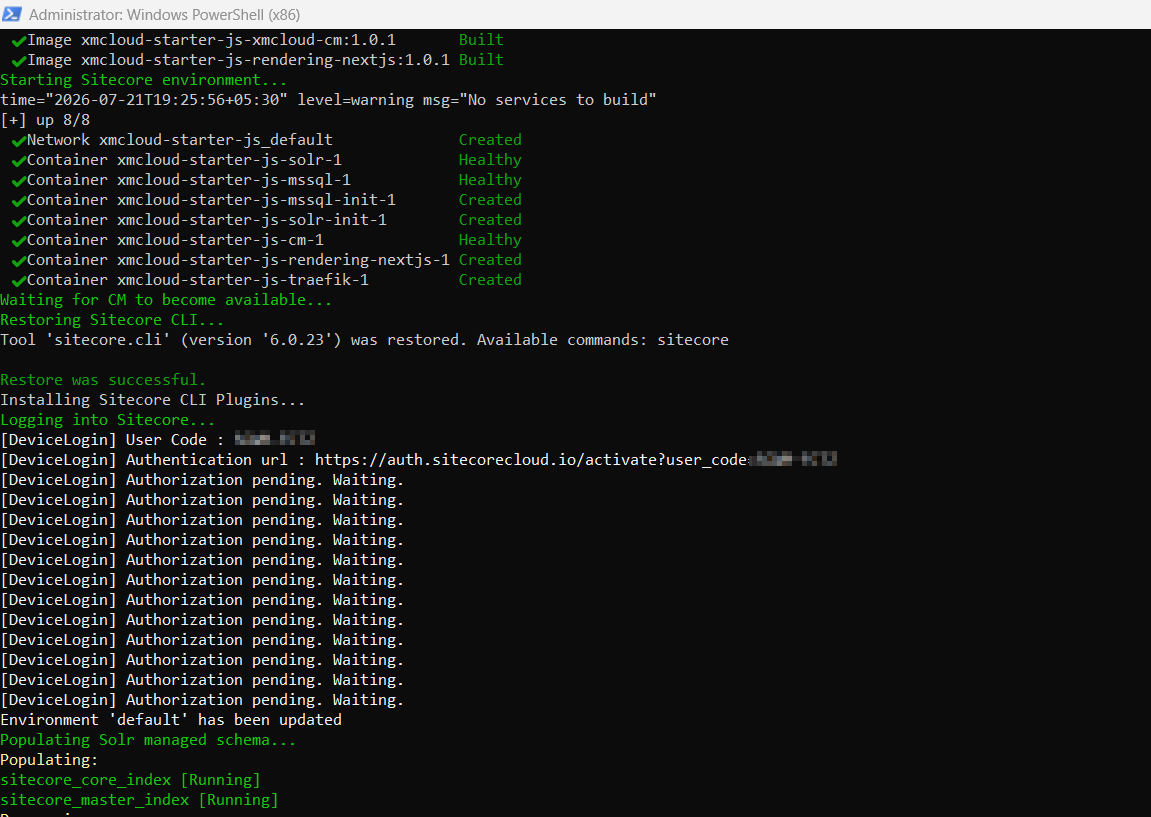
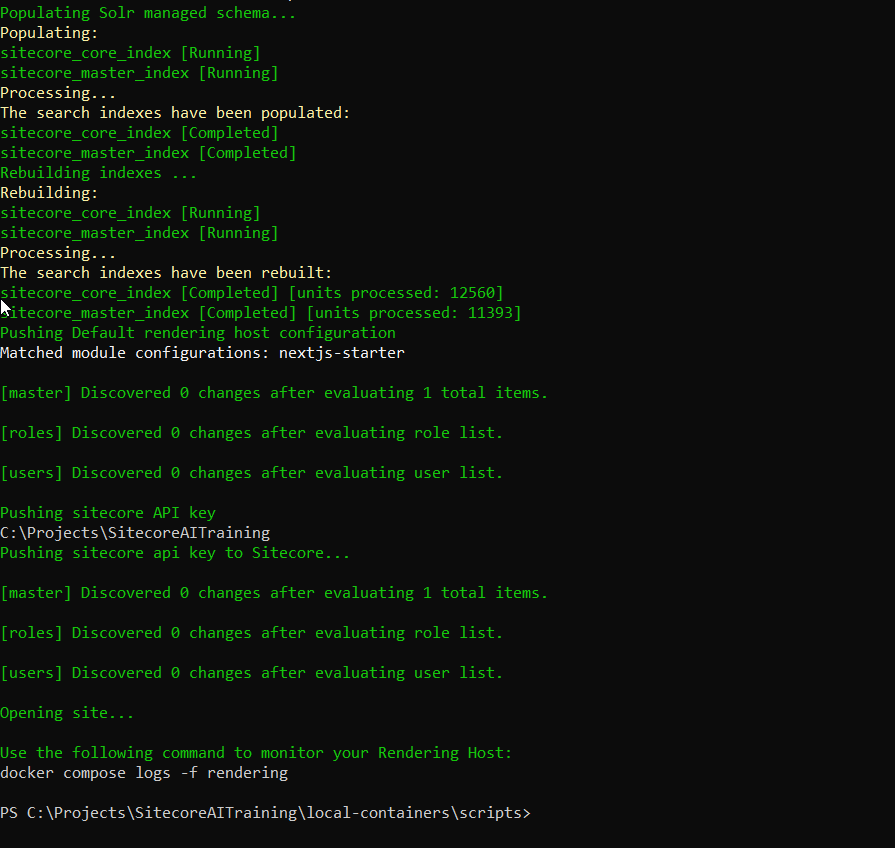
Once the setup is complete, your localhost CM instance will open in your browser.
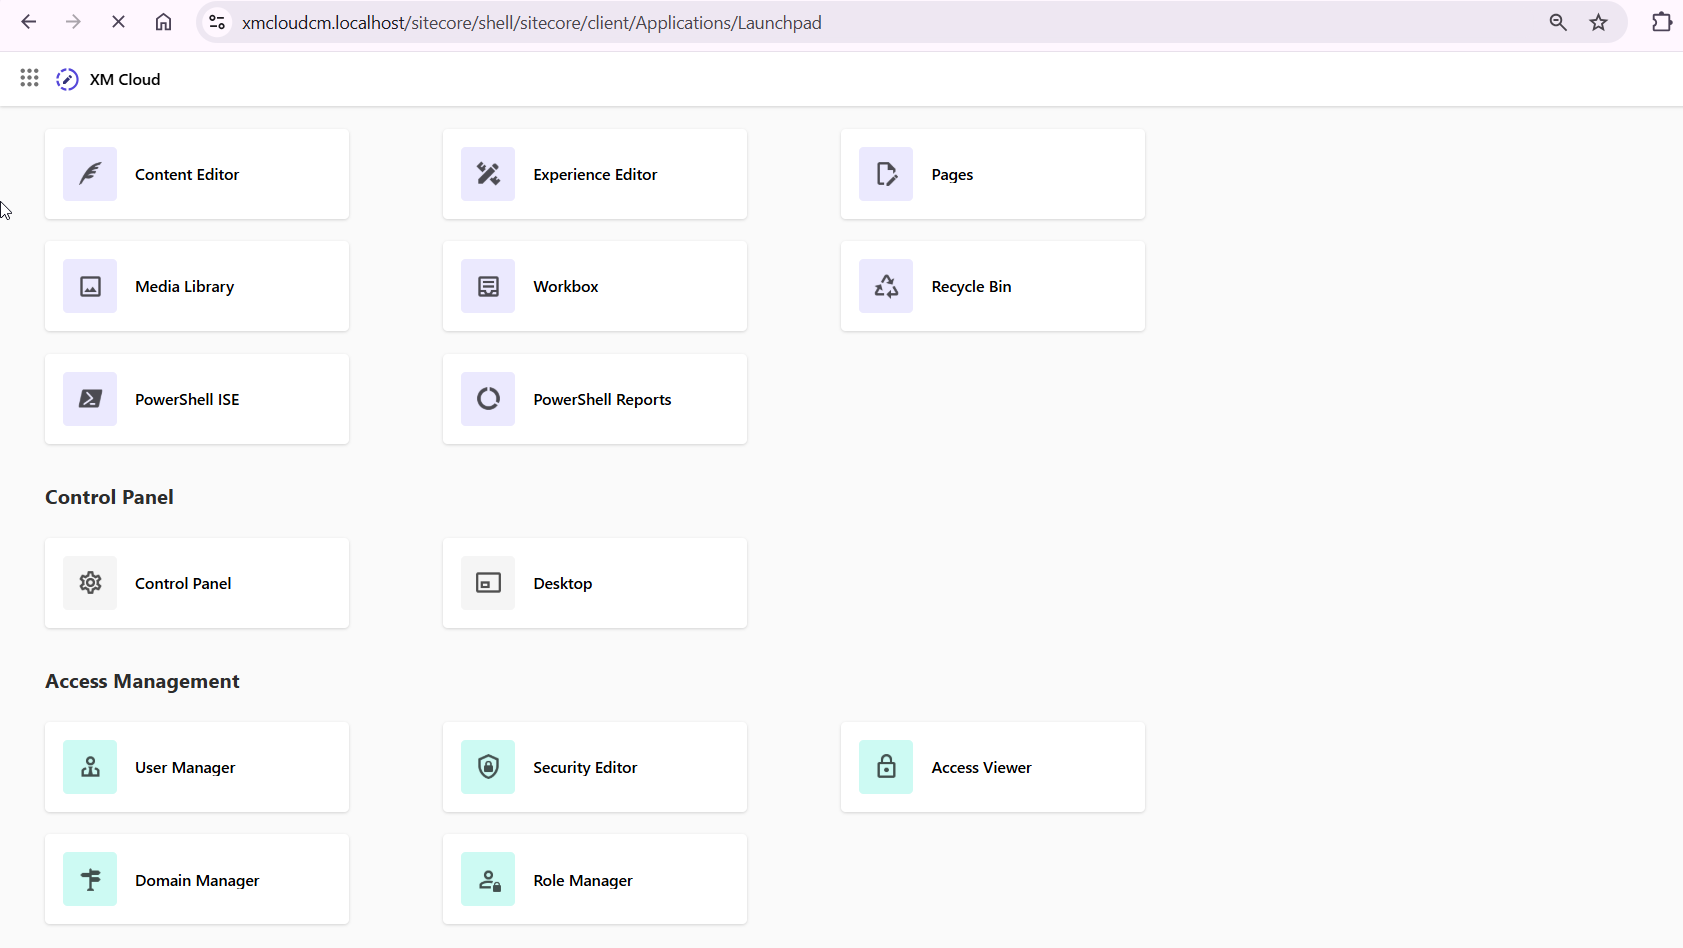
🏗️ Part 2: Configuring the CM Instance
After the containers are running, configure the CM instance for your front-end application.
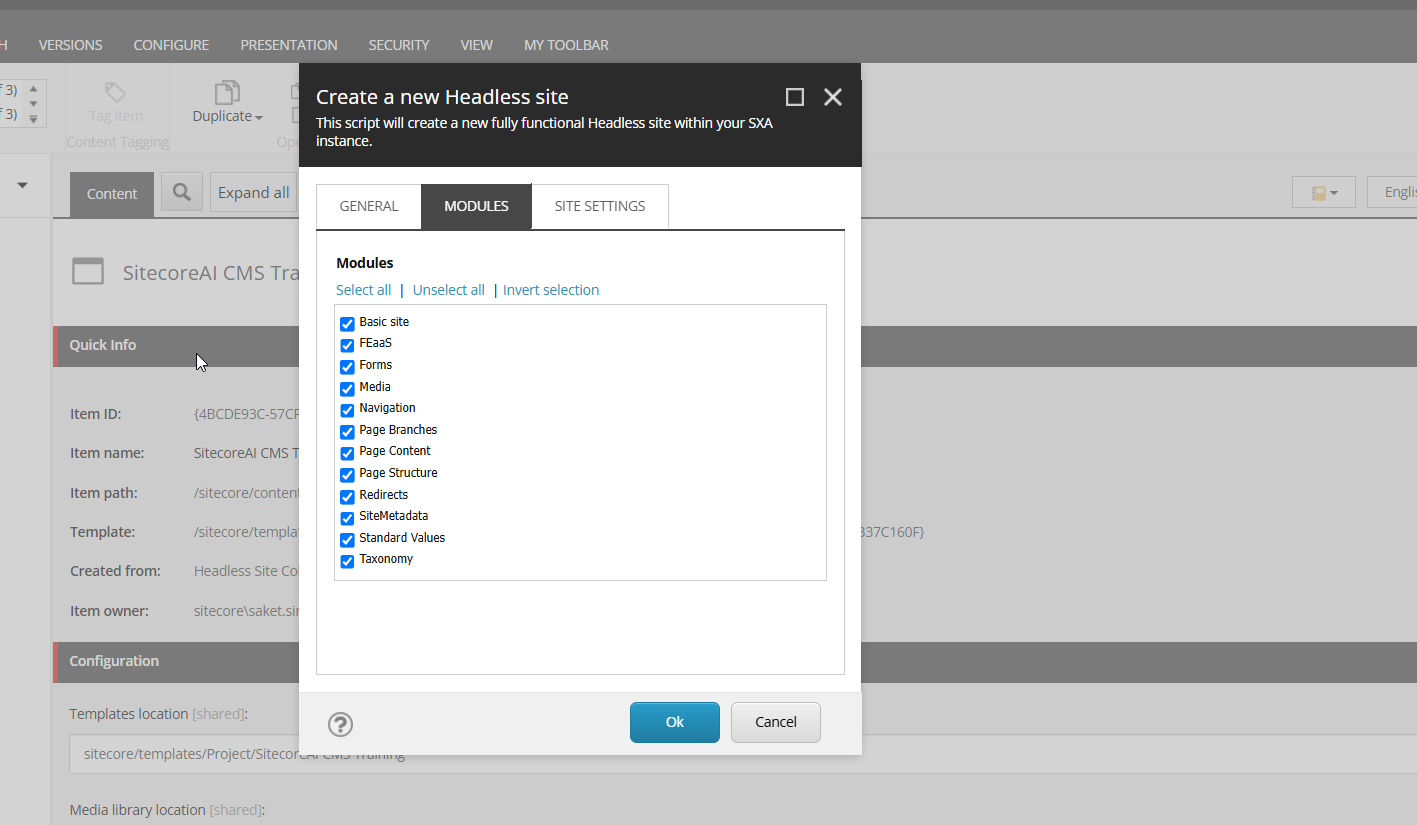
🌐 Create a Headless Site
1. Create a Headless Site Collection
- Navigate to the Content Editor
- Create a new "Headless Site Collection" (e.g.,
Demo)
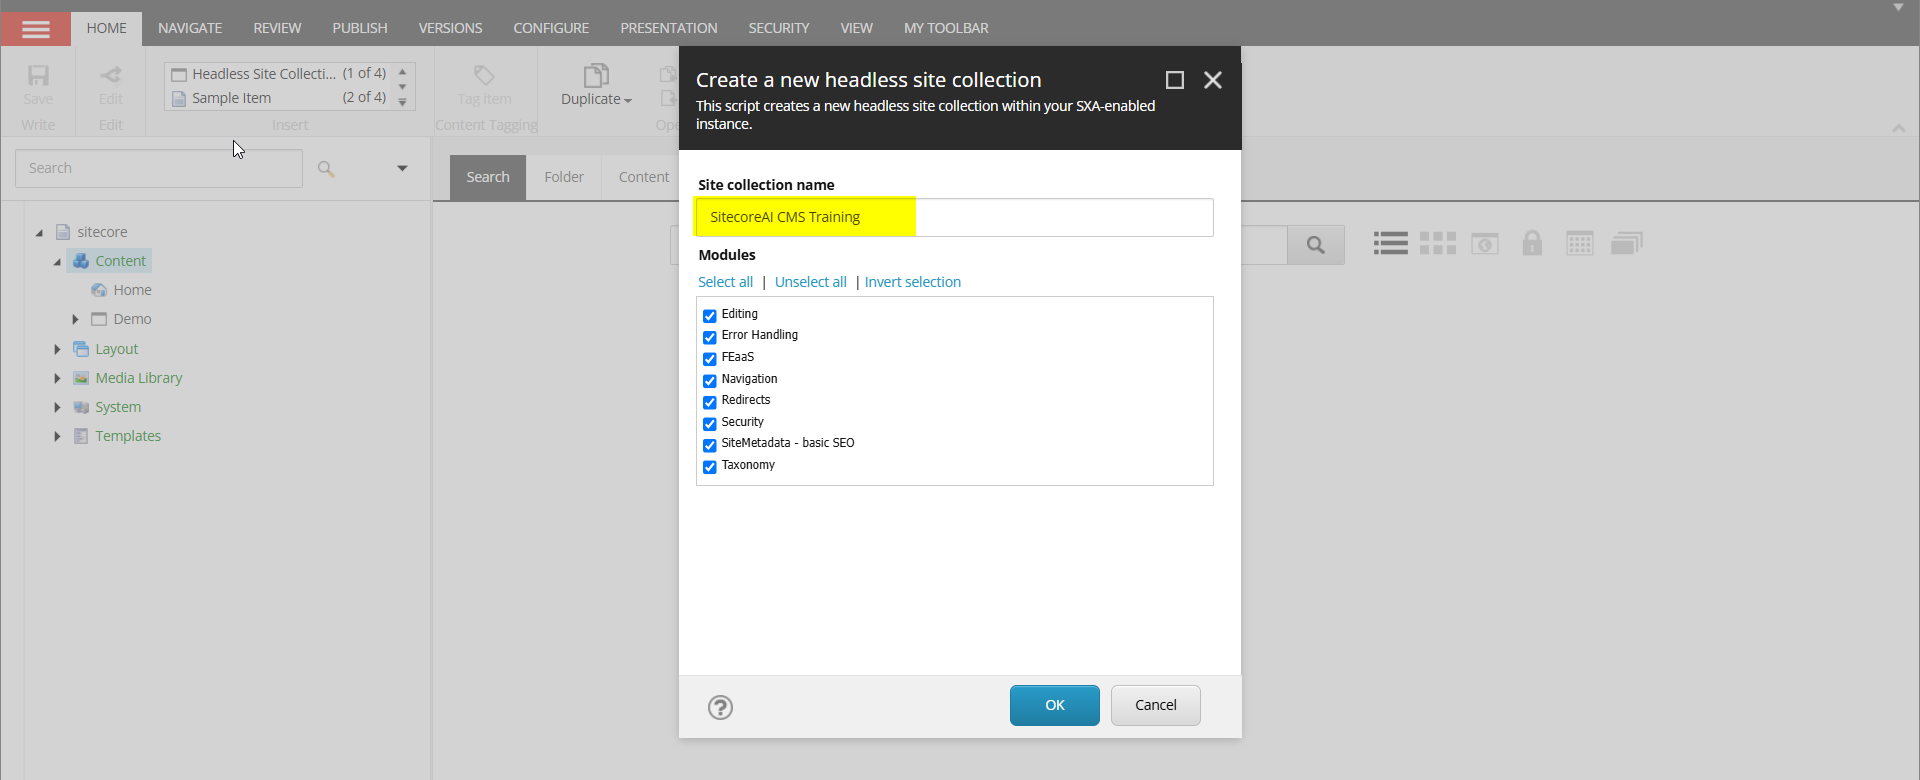
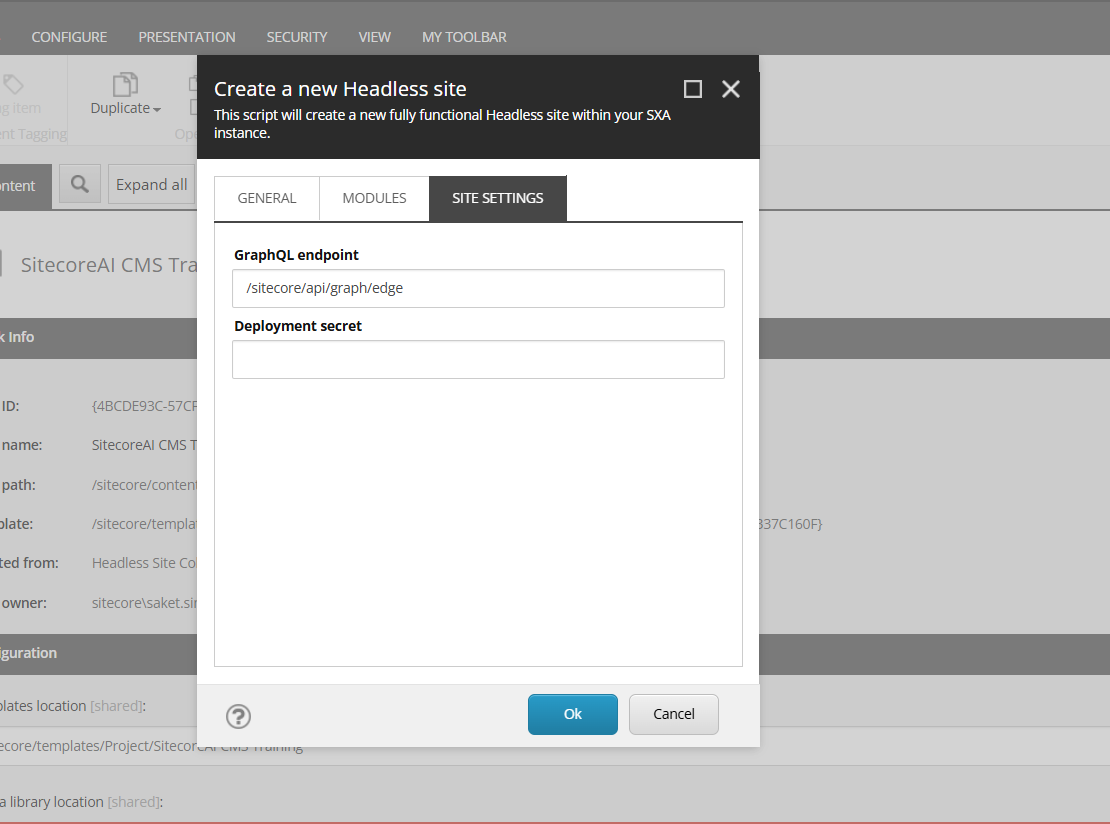
2. Create a Headless Site
- Under the collection, create a new "Headless Site" (e.g.,
demosite)
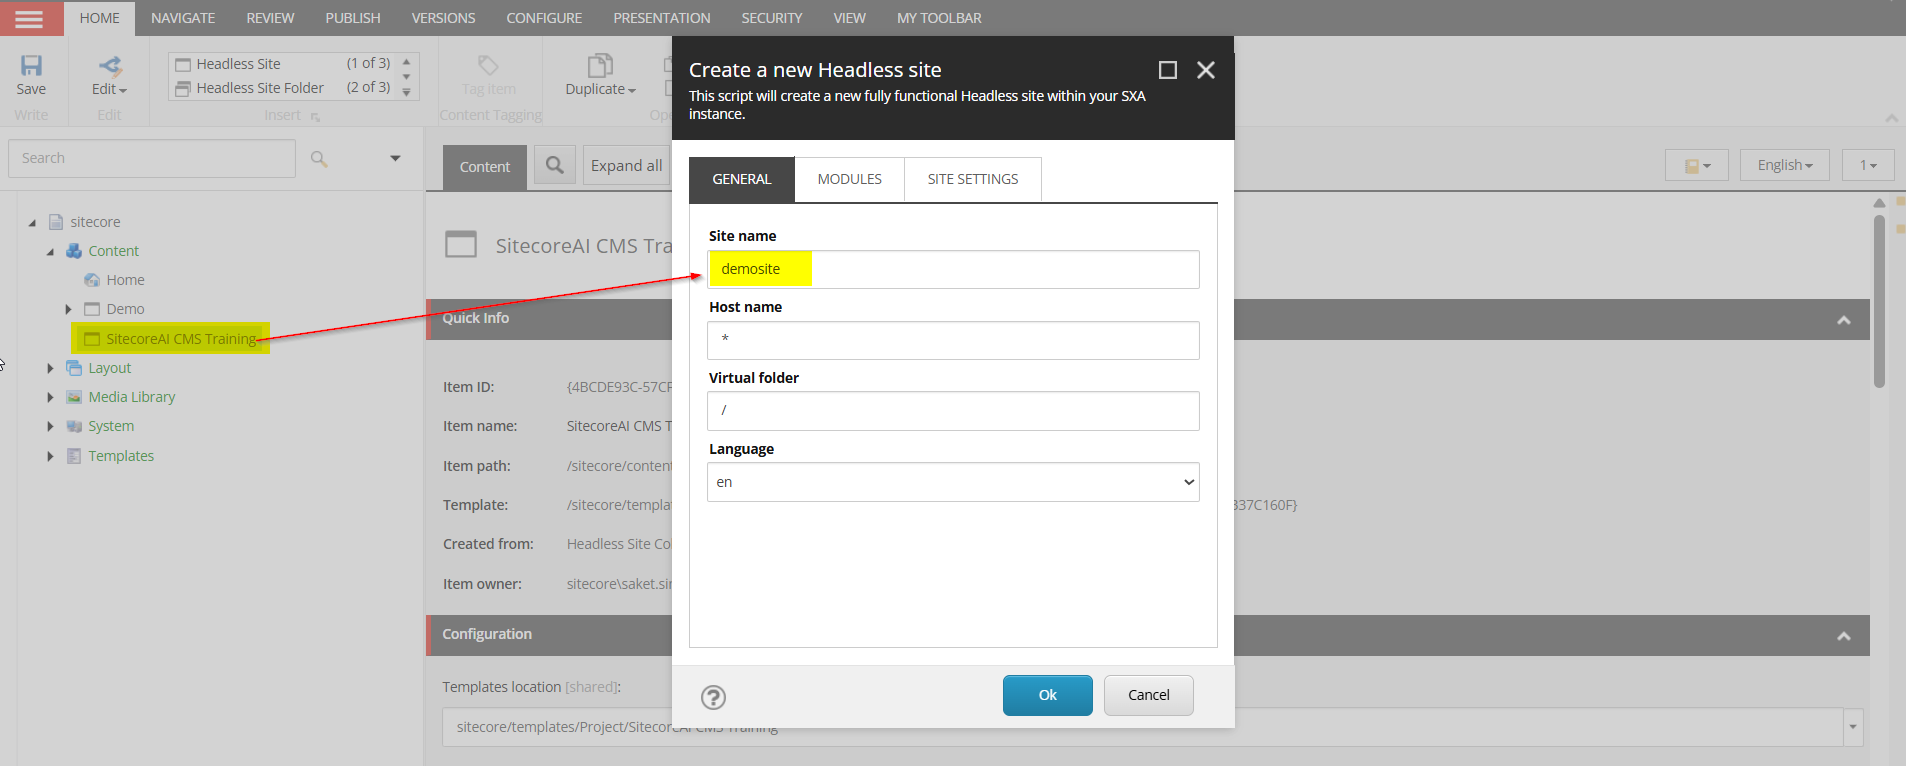
🎨 Configure the Rendering Host
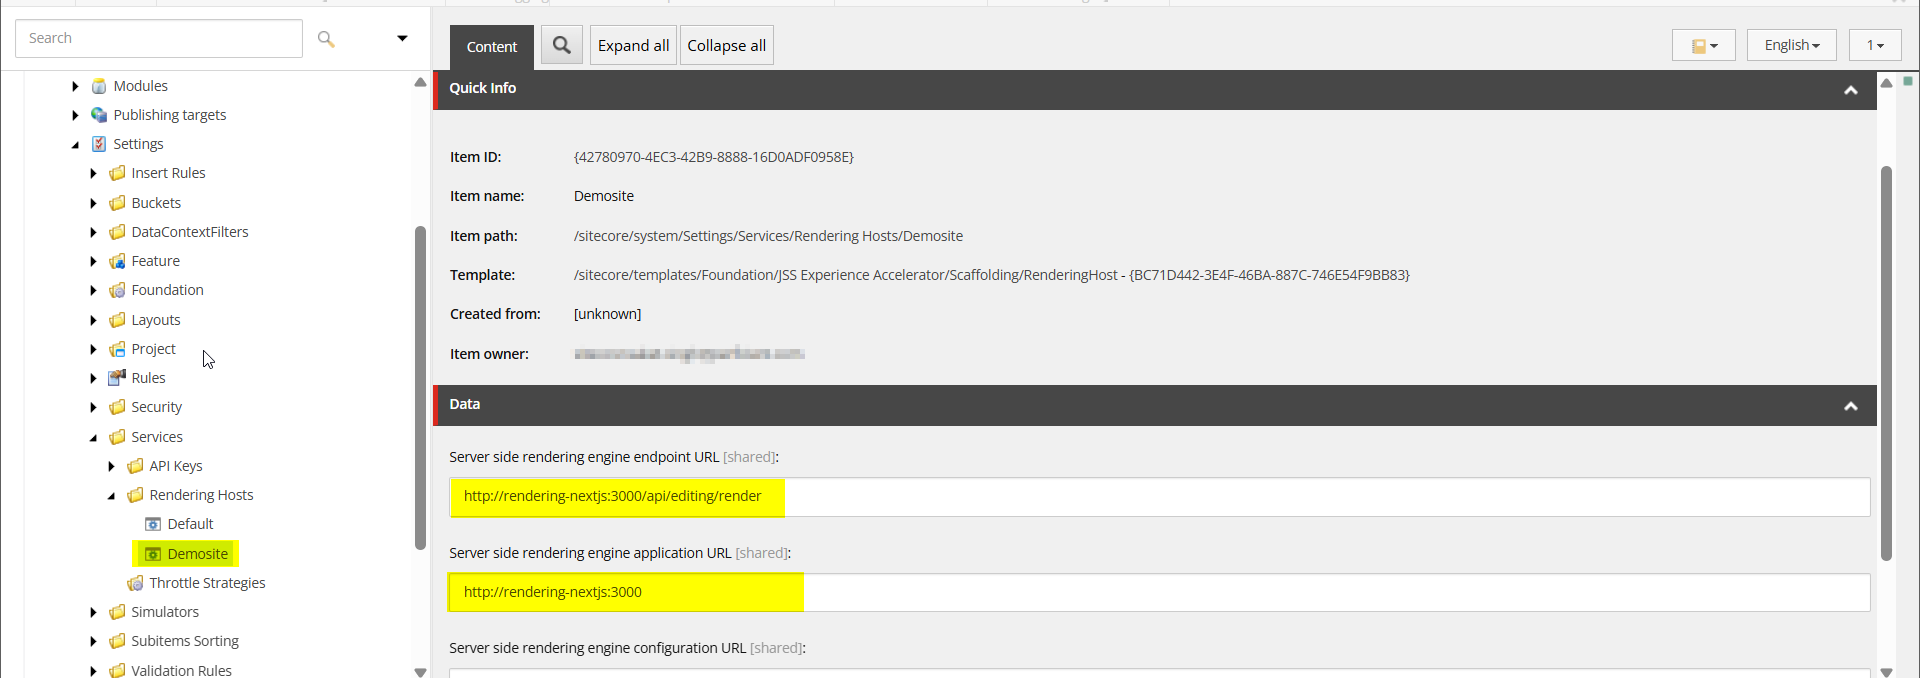
- Navigate to
/sitecore/system/Settings/Services/Rendering Hosts - Keep the existing "Default" rendering host unchanged
- Create a new rendering host matching your site name (e.g.,
Demosite) - Configure the following fields:
| Field | Value |
|---|---|
| Server side rendering engine endpoint URL | http://rendering-nextjs:3000/api/editing/render |
| Server side rendering engine application URL | http://rendering-nextjs:3000 |
Note: These values may vary based on your instance structure or the RENDERING_HOST_INTERNAL_URI variable in your environment configuration.
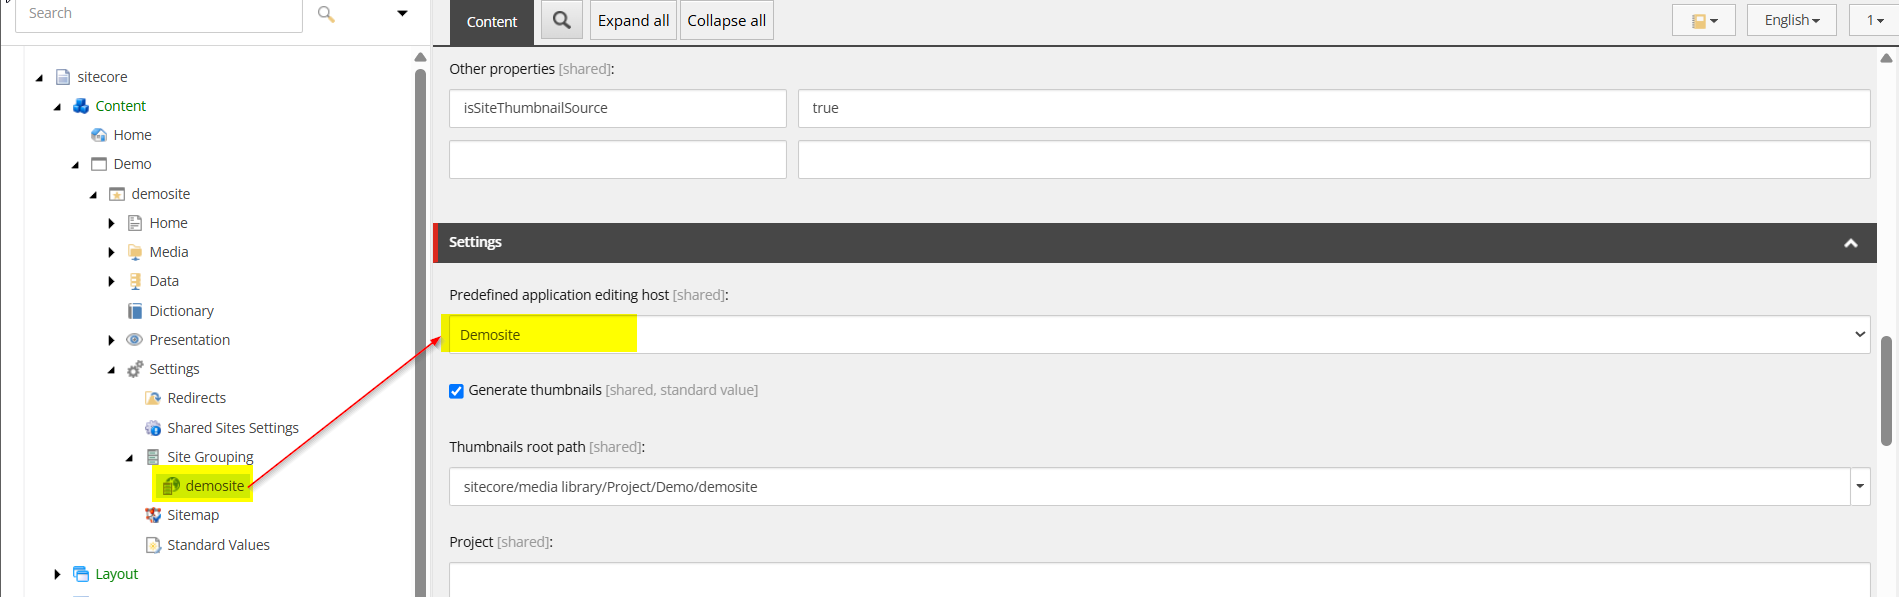
- Map the newly created rendering host to the site grouping.
- For example, select Demosite in the Predefined Application Rendering Host field.
This will associate the newly created rendering host with the selected site grouping.
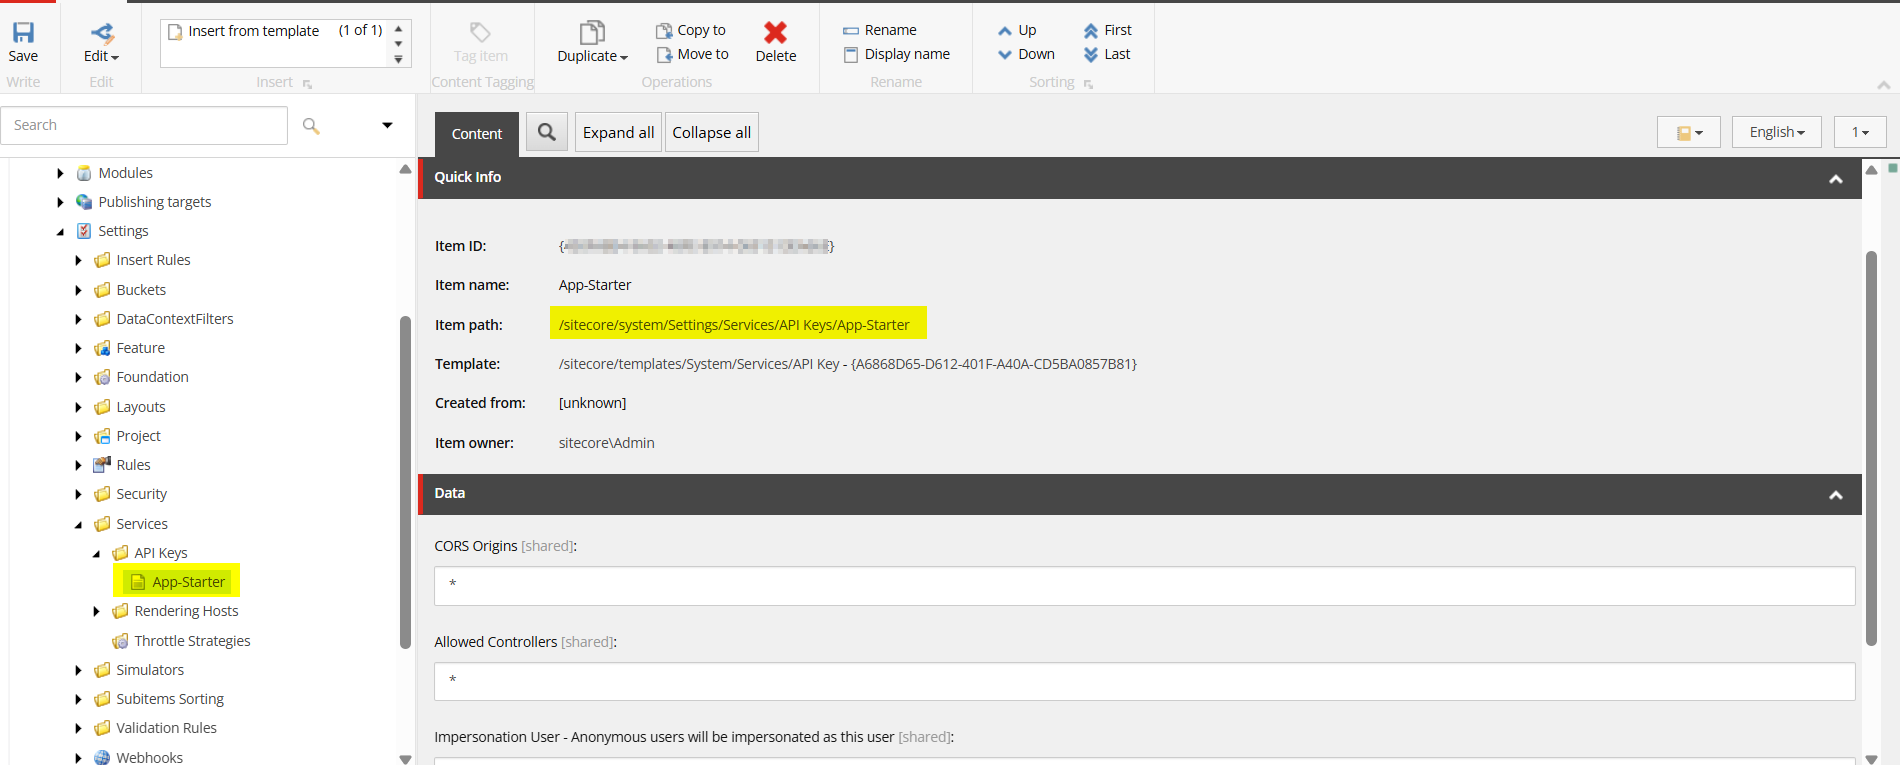
🔐 Copy the API Key
- Navigate to
/sitecore/system/Settings/Services/API Keys/App-Starter - Copy the item ID (without curly braces) - you'll need this for environment configuration
⚙️ Part 3: Environment Configuration
🛑 Stop the Containers
.\down.ps1
📝 Configure local-containers Environment
Navigate to thelocal-containers folder and update the .env file:
SITECORE_API_KEY_APP_STARTER=<paste-app-starter-id-here>
💻 Configure Front-End Environment
- Navigate to your front-end application folder (e.g.,
examples/kit-nextjs-skate-park) - Copy
.env.remote.exampleto.env.local - Update the following variables:
# Copy from local-containers/.env
SITECORE_EDITING_SECRET=<value-from-local-containers-env>

# Your site name from the Content Tree (for example, demosite)
NEXT_PUBLIC_DEFAULT_SITE_NAME=demosite

# Language configuration: we are using English, so the language code is en
NEXT_PUBLIC_DEFAULT_LANGUAGE=en

# Sitecore API Configuration: Default API Host URLs
NEXT_PUBLIC_SITECORE_API_HOST=https://xmcloudcm.localhost
SITECORE_API_HOST=https://xmcloudcm.localhost

# Internal editing host (HTTP, not HTTPS)
SITECORE_INTERNAL_EDITING_HOST_URL=http://localhost:3000

# Database configuration
SITECORE_DEFAULT_DATABASE=master
🔄 Restart the Containers
.\up.ps1
🖥️ Part 4: Setting Up the Front-End Application
📂 Navigate to Your Starter
The/examples folder contains starter front-end applications. Each subfolder is an independent, self-contained working app.
cd examples/kit-nextjs-skate-park
📦 Install Dependencies and Run
npm install
npm run dev
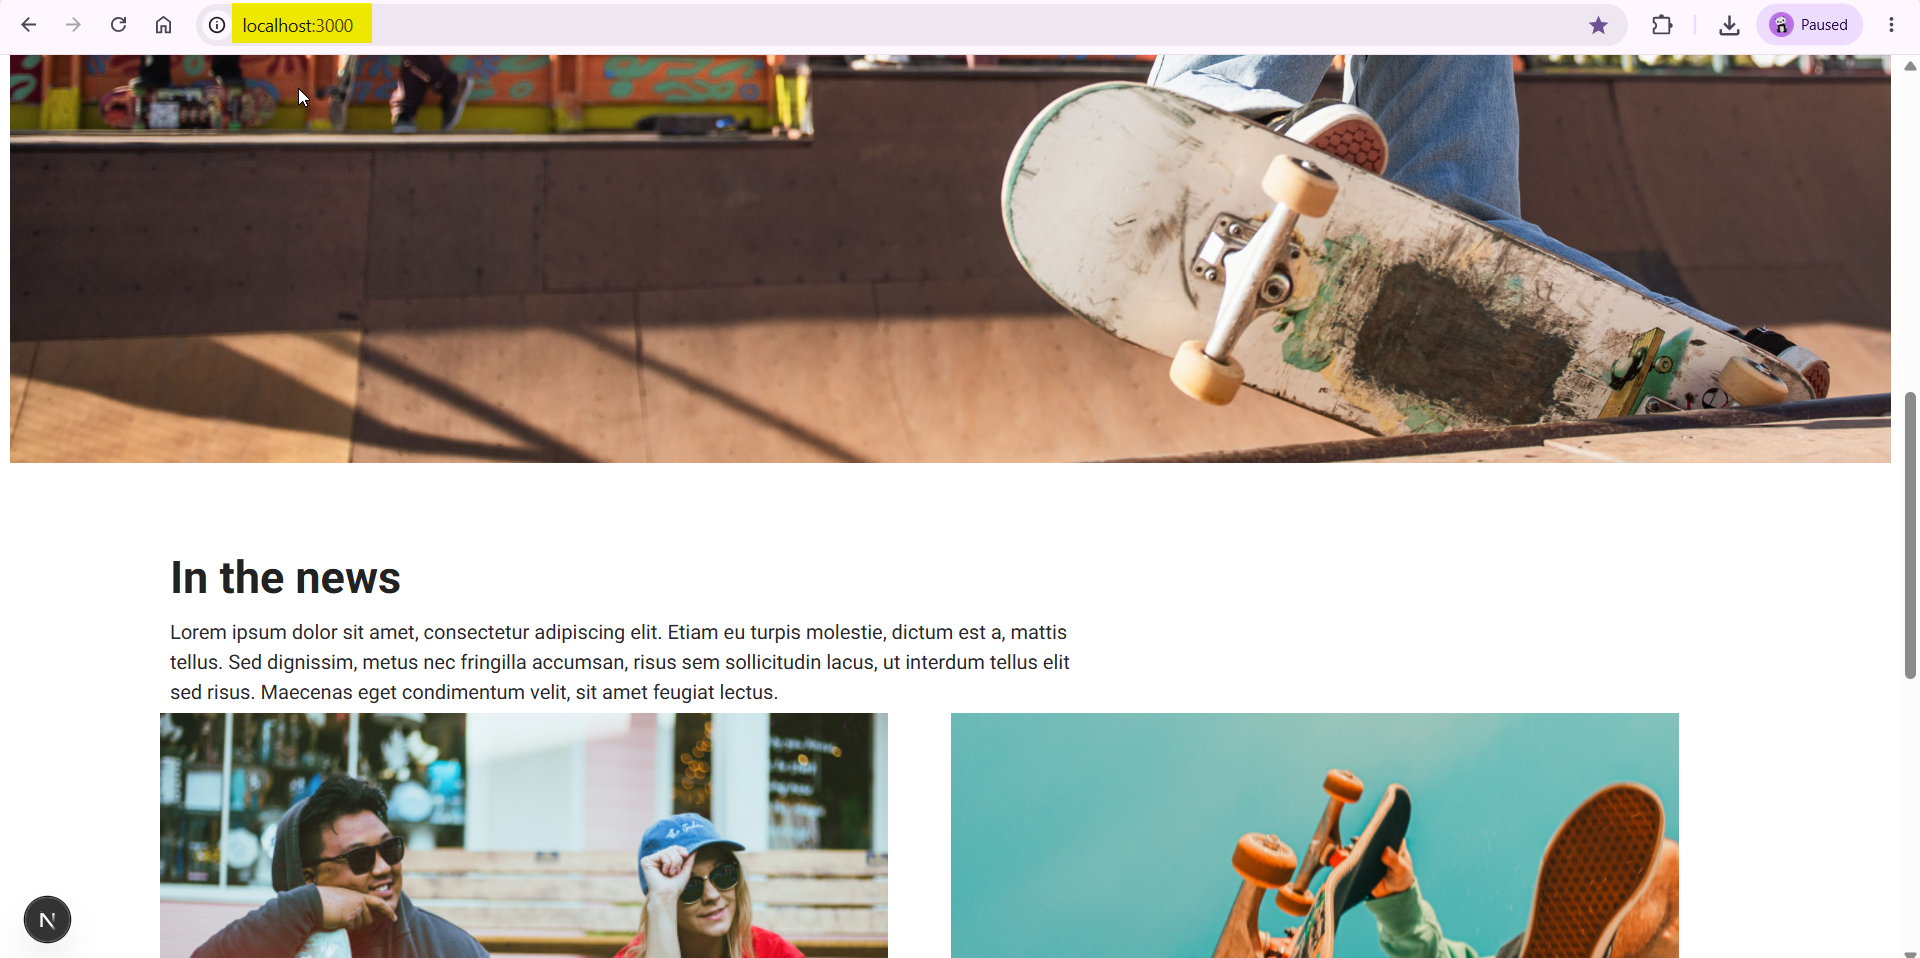
🌍 Access the front end rendering
Open your browser and visit:http://localhost:3000
🔗 Part 5: Connecting to Sitecore Pages (Page Builder)
To edit pages using Sitecore Pages with your local instance:
- Note: The following steps work in Google Chrome.
👤 Step 1: Create a Separate Browser Profile
Create a dedicated browser profile to avoid conflicts with other sessions.
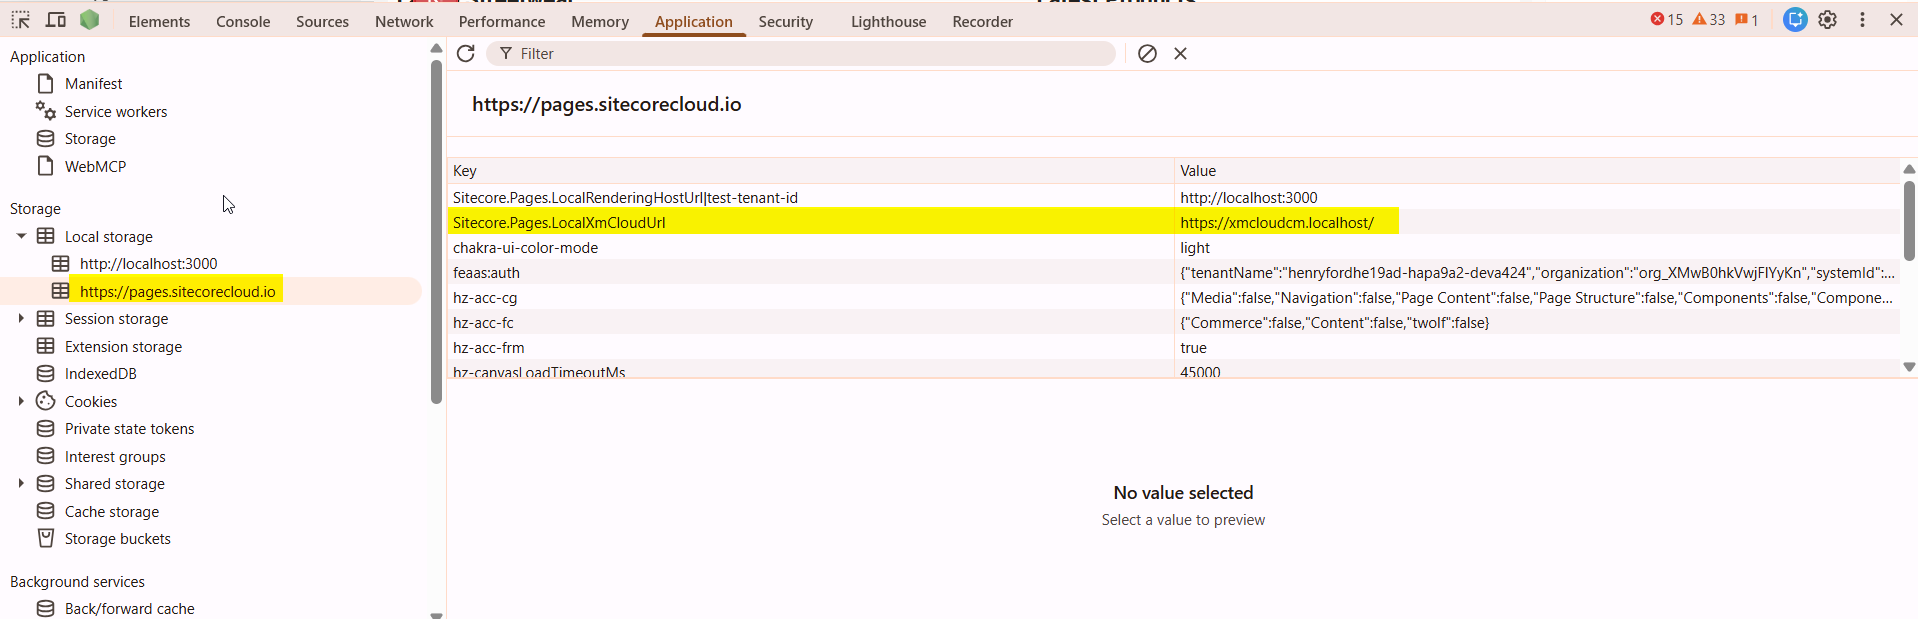
💾 Step 2: Configure Local Storage
- Navigate to the Sitecore Pages App
- Open Developer Tools (F12)
- Go to the Application tab
- Expand Local Storage in the left sidebar
- Click on
https://pages.sitecorecloud.io - Create a new key-value pair:
| Key | Value |
|---|---|
| Sitecore.Pages.LocalXmCloudUrl | https://xmcloudcm.localhost |
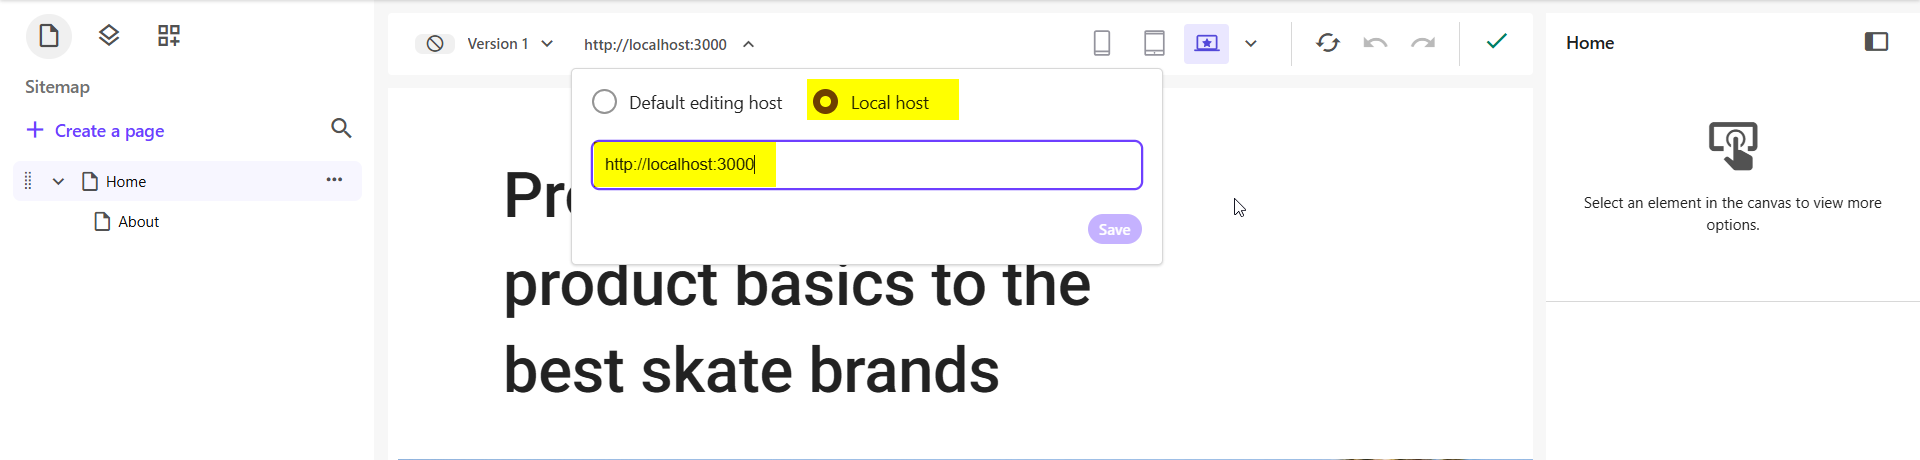
🌐 Step 3: Configure the Page Editor Local Host
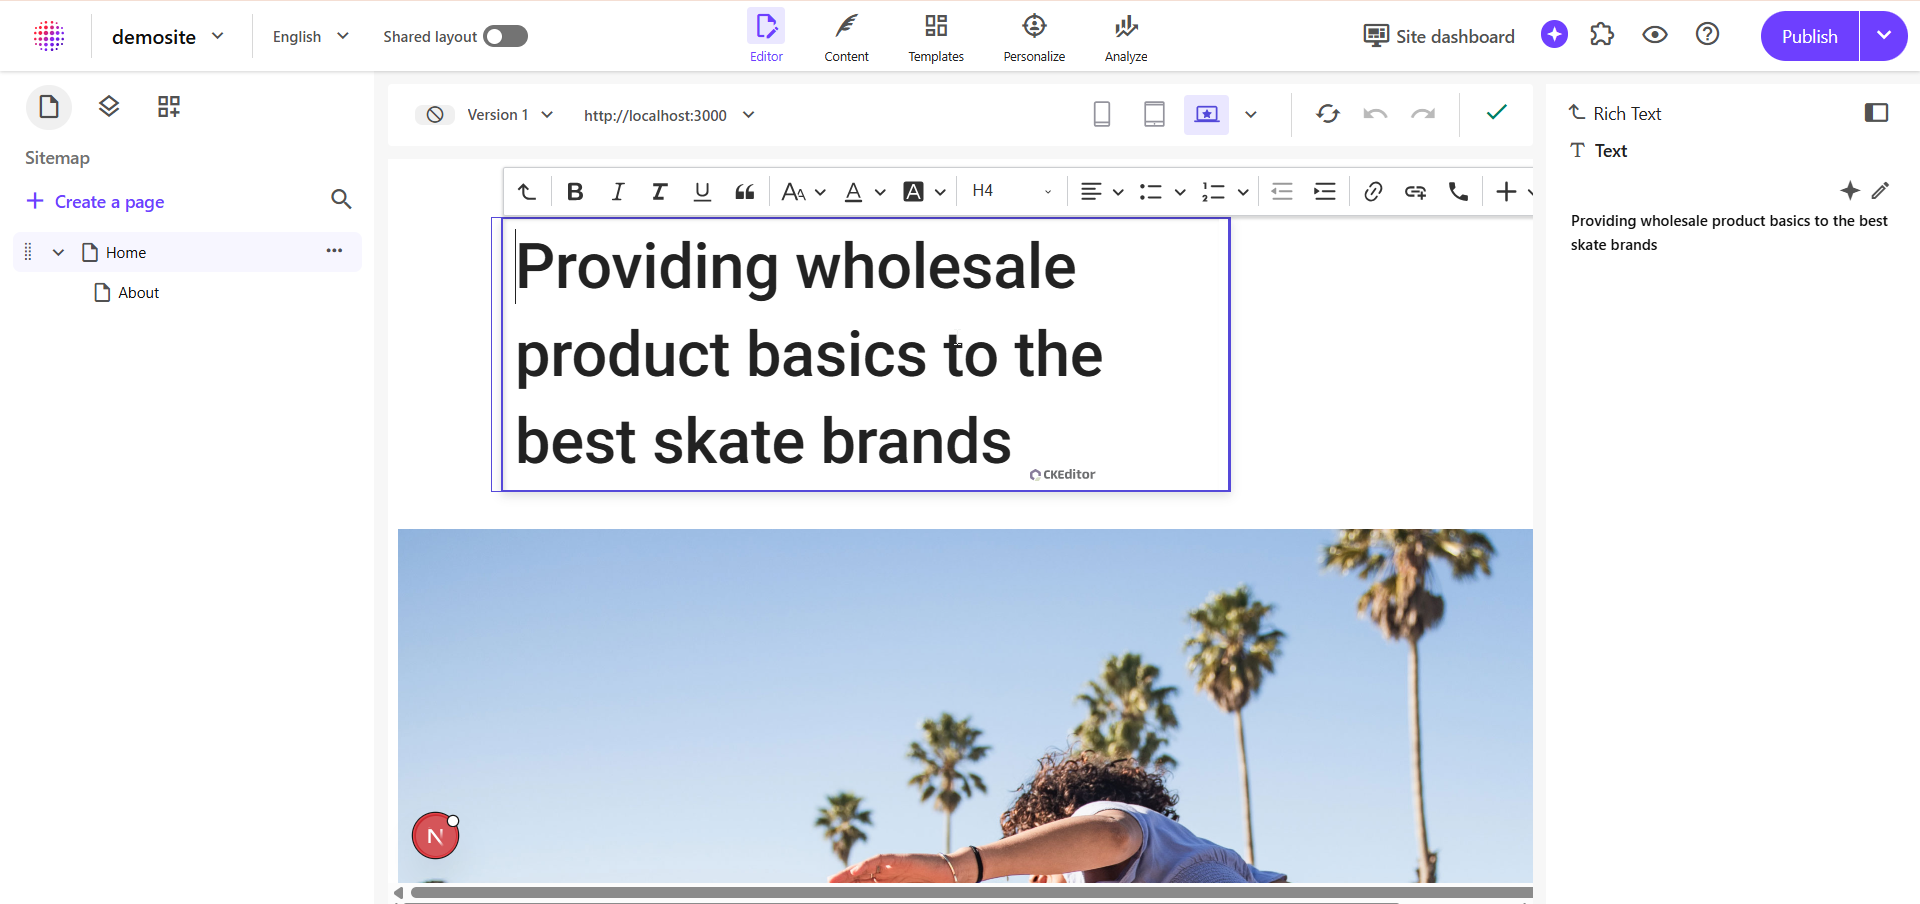
Addhttp://localhost:3000 in the Page Editor's Local host section.
✨ Step 4: Refresh and Start Editing
Refresh the browser tab. The Page Builder will now pull data from your local content tree instead of the cloud, allowing you to add, edit, and update pages locally.
🛠️ Troubleshooting - Common Issues
1.The remote name could not be resolved: 'rendering-nextjs
- Ensure the rendering-nextjs container is running:
docker ps - Start it manually if needed:
docker-compose up -d rendering-nextjs
2.SSL/HTTPS Errors
- Make sure
SITECORE_INTERNAL_EDITING_HOST_URLuseshttp://nothttps://for local development
📋 Local Instance URL's
| Component | URL |
|---|---|
| CM Instance | https://xmcloudcm.localhost |
| Front-End (Local) | http://localhost:3000 |
| Sitecore Pages | https://pages.sitecorecloud.io |
🎉 Wrapping Up
With this local setup, you can develop and test your SitecoreAI CMS headless applications without relying on cloud infrastructure. The combination of Docker containers, Content SDK, and Sitecore Pages provides a complete development workflow with faster iteration cycles and full debugging capabilities.
Happy coding!